Creating a new project
To create a new
project, click
1.
File
2.
New project
3.
Name your
project from the project location e.g C:\Users\user\Document\Tutorial 1. Where
Tutorial 1 is the name of my new project.
You can choose
to import unity package like terrain, character controller etc but for now, we
leave the check box empty. Also, you can choose what type of game to make using
the setup defaults for: 3D. In this
option, we consider using 3D.
Your First View
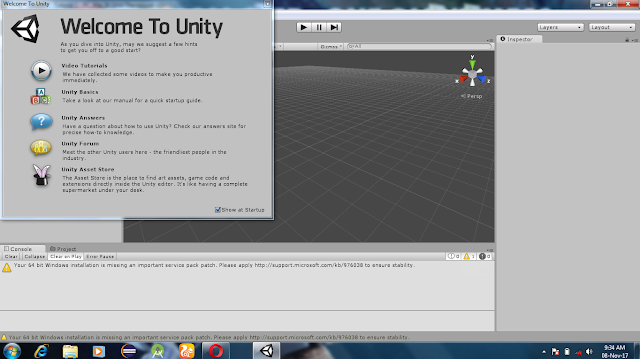
Your first view in
unity shows the startup welcome to unity banner. It consists of video
tutorials, unity basics, unity answers, and unity forum and unity assets store.
The Asset store is where you can buy or download unity packages.
Getting to unity, a
default view contains only the main camera in the hierarchy view. You can
select the camera either by clicking on it from the hierarchy view or from the
scene view. When the main camera is clicked, the inspector view list out all
the properties associated with the main camera. Remember you can add components
from the inspector view.
The console view is
where you can see all information about what is going on like error, game play
messages etc.
The project view is a
file that contains other different game object, script, component, materials
etc.
Creating a Terrain
A terrain is just an
area of land. It is found in game object from the tool bar. To create a terrain
1.
Click on game
object
2.
Click on create
others
3.
Click on terrain
Double click on the
terrain from the hierarchy or scene view to zoom out of the terrain or focus on
the terrain. Click on the setting button in the terrain script to bring out
more properties of the terrain. The terrain has Base terrain, Tree and detains
objects, wind settings, Resolution and Height map. Navigate to the terrain
resolution and change the width and height to 500 to see how it works. You can
choose to set it to any width and height. Remember you can zoom in using your
mouse by
1.
Press Q on your keyboard
2.
Click alt +
right click + scroll down
To raise or lower
Terrain
1.
Click on raise
or lower terrain button
2.
Choose any brush
3.
Choose your
brush size and opacity
4.
Double click on
the terrain to create mountain like shapes i.e. raising terrains
5.
Click and hold
shift + double click on the terrain to lower the terrain
At this point, navigate
to assets from the tool bar
1.
Click on import
package
2.
Choose terrain
assets
3.
Click import
Notice that in the
project view, a file known as standard assets has been added to the assets
folder.
1.
Click on edit
texture from the inspector view
2.
Click on add
texture
3.
Click select
4.
Choose any
assets by double clicking
5.
Click add
For the first time, the
texture will be applied to all areas of the terrain game object. Following the
same procedure add a grass like texture to the terrain by
1.
Navigate to the
paint brush
2.
Click on your
grass-like texture
3.
Click on where
to add a grass in your terrain
In the next tutorial,
you will learn how to add water, tress camera skyboxes and first person character
controller. See you in the next tutorial.


No comments:
Post a Comment